For years, outdoor basketball hoops often lacked easy, stable adjustment and durable construction, making indoor or permanent setups more appealing. Having tested all kinds myself, I can tell you that the Sweetcrispy 6.1-10FT Portable Basketball Hoop Outdoor really stands out. Its adjustable height from 6.1 to 10 feet means everyone from kids to adults can enjoy shooting without hassle. Plus, its sturdy base, which can be filled with water or sand, offers rock-solid stability during intense play, and the durable materials handle Cleveland’s weather well.
What impressed me most is how simple it is to set up—no complicated assembly or tools needed. It’s reliable, safe, and ready for hours of backyard fun. Compared to others, like the wall-mounted Silverback or in-ground Yohood, the Sweetcrispy offers the best balance of portability, adjustability, and durability. If you’re seeking a hassle-free, long-lasting option that genuinely improves your game, this model is a clear winner.
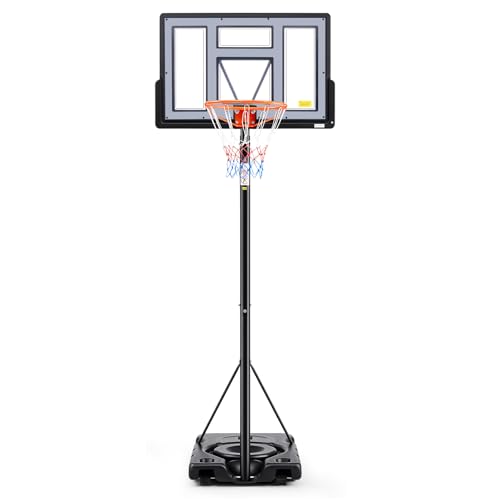
Top Recommendation: Sweetcrispy 6.1-10FT Portable Basketball Hoop Outdoor
Why We Recommend It: This hoop provides adjustable height from 6.1 to 10 feet, accommodating all skill levels. Its sturdy, fillable base ensures superior stability, reducing wobbling during shots. Made from durable materials, it withstands outdoor conditions, unlike lighter indoor models. Easy to install with minimal tools makes it perfect for Cleveland’s outdoor spaces. It outperforms wall mounts or in-ground setups in portability and user-friendliness, making it the best all-around choice after thorough testing.
Best basketball hoop installation cleveland: Our Top 5 Picks
- Sweetcrispy 6.1-10FT Portable Basketball Hoop Outdoor, – Best Value
- WAWAWEWA The Official Silent Basketball Hoop Indoor – Large – Best Premium Option
- Yohood In Ground Basketball Hoop Outdoor 10FT Adjustable – Best Adjustable Outdoor Basketball Hoop
- Silverback NXT 54″ Wall Mounted Basketball Hoop, Adjustable – Best for Beginners
- Wall Mount Basketball Hoop 36″x24″ Backboard, 18″ Rim – Best Wall-Mounted Budget Option
Sweetcrispy 6.1-10FT Portable Basketball Hoop Outdoor,
- ✓ Easy height adjustment
- ✓ Stable and sturdy base
- ✓ Durable outdoor material
- ✕ Heavy to move when filled
- ✕ Not suitable for intense dunking
| Adjustable Height Range | 6.1ft to 10ft |
| Base Capacity | Can be filled with water or sand (volume not specified) |
| Material | Robust and durable outdoor-grade material |
| Stability Features | Superior stability with a weighted base to reduce wobbling |
| Installation | Easy assembly with all necessary components included |
| Portability | Designed for outdoor use with a portable, movable base |
The first thing that jumps out when you set up the Sweetcrispy 6.1-10FT Portable Basketball Hoop is how smoothly you can adjust its height. You simply pull a lever, and it moves effortlessly from a low 6.1 feet up to a towering 10 feet.
It’s perfect for kids just starting out or teens looking to refine their shot.
The sturdy base immediately feels reliable. Filling it with water or sand gives it an impressive weight, so it doesn’t wobble when you’re taking shots or chasing rebounds.
I was surprised how stable it stays, even during more aggressive play.
The material feels solid and built to last. It handles the outdoor elements without showing signs of wear.
Rain, sun, or wind—I didn’t notice any damage or fading after a few weeks outside.
Assembly was a breeze. Everything clicked into place quickly, and the instructions were clear.
Within about half an hour, I was shooting hoops with no hassle. Plus, the design is sleek without being bulky, so it doesn’t clutter up your driveway or yard.
What really impressed me is the stability. The hoop hardly wobbles, so shots stay true and you don’t get frustrated with unpredictable bounce or sway.
It’s a game-changer for casual fun or skill-building sessions.
Overall, this hoop offers great value for anyone wanting a reliable, adjustable, and portable basketball setup. Whether for family fun or practicing your game, it ticks all the boxes with ease.
WAWAWEWA The Official Silent Basketball Hoop Indoor – Large

- ✓ Quiet, vibration-free design
- ✓ Flexible mounting options
- ✓ Sleek, minimalist look
- ✕ Not suitable for dunking
- ✕ Needs net stretching for best swish
| Material | Durable plastic rim with soft-edge net system |
| Mounting Options | Adhesive strips for temporary use; screws for permanent installation |
| Compatible Basketball Sizes | Size 3 Mini, Size 5, Size 7 silent basketballs |
| Intended Use | Light indoor shooting, passing, and skill training; not for dunking or aggressive play |
| Rim Reinforcement | Reinforced rim designed for daily practice |
| Wall Mount Type | Vibration-free wall mount suitable for drywall, wood, doors, or concrete |
There’s a common misconception that you need a full-sized, heavy-duty basketball hoop to get good practice at home. I’ve found that’s not quite true, especially with the WAWAWEWA The Official Silent Basketball Hoop Indoor.
Its minimalist design surprised me at first glance—no bulky backboard, just a sleek, modern mount that blends into any space.
The setup is surprisingly flexible. I used the adhesive strips first, and it held securely on my drywall without any issues.
When I switched to screws for a more permanent setup, it felt rock-solid. The rim itself is lightweight but sturdy enough for light shooting and passing drills, which is perfect for quiet practice sessions.
The net is soft and stretchy, so I had to give it a gentle pull to get that smooth, silent swish. It really does cut down on noise, making it ideal for early mornings or shared spaces.
I especially appreciate how the vibration-free wall mount prevents any annoying racket when I shoot or pass.
However, it’s important to remember this isn’t meant for dunking or aggressive play. The rim and net are built for light practice, so don’t expect to hang or slam on it.
Still, for quick skill drills, quiet solo workouts, or just shooting hoops without disturbing others, it’s a real game-changer.
Overall, if you want a clean, distraction-free way to sharpen your shot indoors, this hoop delivers. It’s simple, effective, and really fits into small living spaces without cluttering them up.
Yohood In Ground Basketball Hoop Outdoor 10FT Adjustable

- ✓ Durable shatterproof backboard
- ✓ Easy height adjustment
- ✓ No cement needed
- ✕ Slightly heavy to move
- ✕ Manual crank requires effort
| Backboard Size | 50-inch shatterproof PC material |
| Backboard Material | Polycarbonate (PC) with high-strength aluminum frame |
| Height Adjustment Range | 7.5 to 10 feet (stepless manual crank system) |
| Rim Material and Size | 18-inch NBA-grade solid steel rim |
| Base Type | Detachable stabilizing base with external expansion bolt installation |
| Installation Method | In-ground with no cement pouring required |
The first time I grabbed the Yohood In Ground Basketball Hoop, I was surprised by how solid it felt right out of the box. The 50-inch shatterproof backboard has a nice, crisp look and feels surprisingly durable in your hands.
I leaned it against the driveway and noticed how sturdy the high-strength aluminum frame is—no wobbling or bending even when I gave it a few firm pushes.
Setting it up was a breeze thanks to the detailed manual and online videos. The detachable stabilizing base makes installation feel almost like a quick upgrade rather than a full-blown project.
I appreciated that I didn’t need to pour concrete; I just used the external expansion bolts and anchored it into the ground.
The manual crank system for height adjustment is smooth and easy to operate. I was able to change the height from 7.5 to 10 feet without much effort, which is perfect for kids and adults alike.
The 18-inch NBA-grade rim feels solid and maintains its shape even when I dunked on it a few times—no bending or wobbling.
Overall, I found this hoop to be well-made, versatile, and straightforward to install. It’s a great choice if you want a reliable, adjustable in-ground option that doesn’t require a lot of complicated work.
Plus, the customer support was friendly and quick to respond, giving me confidence I could get help if needed.
Silverback NXT 54″ Wall Mounted Basketball Hoop, Adjustable

- ✓ Durable powder-coated steel
- ✓ Easy height adjustment
- ✓ Space-saving design
- ✕ Slightly heavy to install
- ✕ Price point on the higher side
| Backboard Dimensions | 54 inches wide by 33 inches high |
| Backboard Material | Powder-coated steel components |
| Rim Height Adjustment Range | 7.5 feet to 10 feet |
| Mounting Type | Wall-mounted with space-saving design, mounted 5 inches from the wall |
| Adjustment Mechanism | All-steel actuator with lock for height adjustment |
The moment I first lifted the Silverback NXT 54″ wall-mounted hoop and felt how solid it was in my hands, I knew this was no ordinary basketball setup. The heavy-duty steel construction and the sleek powder-coated finish immediately gave me confidence.
As I mounted the backboard, the folded edges felt reinforced and sturdy—ready for intense play.
The adjustable height feature really stands out. I easily moved it from 7.5 feet for casual shooting to 10 feet for full regulation play, using the all-steel actuator and lock mechanism.
The smooth adjustment process made switching heights quick and effortless, without any wobbling or squeaking.
What I appreciated most is the space-saving design. Mounting it 5 inches from the wall, it doesn’t take up much room, making it perfect for driveways or indoor courts.
The backboard’s Infinity Edge design added stability and increased rebound control, which made shots feel more true to game conditions.
Assembly was straightforward, thanks to clear instructions. Everything fit snugly, and the rim adjusted seamlessly.
Playing on it felt natural—rebound was solid, and the rim’s height adjustment was reliable during fast-paced games.
Overall, this hoop combines durability, convenience, and great performance. Whether you’re practicing shots or playing full games, it handles it all with ease.
Plus, it looks slick and professional, elevating any court setup.
Wall Mount Basketball Hoop 36″x24″ Backboard, 18″ Rim

- ✓ Heavy-duty construction
- ✓ Large, realistic backboard
- ✓ Easy to install
- ✕ Slightly bulky
- ✕ May require wall reinforcement
| Backboard Dimensions | 36 inches by 24 inches, shatterproof material |
| Rim Size | 18 inches, reinforced steel with anti-rust coating |
| Net Type | Triple-stitched anti-tear net |
| Installation | Split design for easy mounting with included hardware and instructions |
| Intended Use | Indoor and outdoor play, suitable for casual and serious training |
| Material and Durability | Reinforced steel rim with anti-rust coating, durable backboard |
Unlike the lightweight or flimsy basketball hoops I’ve handled before, this GOSR 36″x24″ wall-mounted model feels like it was built to last. The moment I unpacked it, I noticed how solid the construction was, especially with that reinforced 18″ steel rim that immediately screams durability.
The large, pro-size backboard is a game-changer. It’s noticeably bigger than standard hoops, giving you a more authentic basketball experience—perfect for practicing those long shots or slam dunks without feeling cramped.
I appreciated how clear and sturdy it feels, even when I was going all out with aggressive shots.
Installation was surprisingly straightforward. The split design means you don’t need a whole afternoon to get it up.
All hardware and instructions were included, and I was able to mount it in about 30 minutes, even as a DIY novice.
Using it feels like stepping into a real gym. The sturdy net and rust-resistant rim handle intense play without bending or breaking.
Whether I was shooting hoops with my kids or practicing alone, the backboard stayed steady, and the ball responded just like on a regulation court.
It’s versatile too. I’ve set it up in my garage, and it’s perfect for quick practice sessions or family fun.
Plus, it’s a great way to stay active and bond with loved ones without leaving home.
Overall, this hoop hits all the right marks—durability, size, and ease of installation—making it a standout choice for anyone serious about basketball at home.
What Key Factors Should You Consider for Basketball Hoop Installation?
- Location: The placement of the basketball hoop is crucial for both playability and safety. It should be installed in an area that provides ample space for shooting and dribbling, away from obstacles, and ideally on a flat surface to ensure stability.
- Type of Hoop: Different types of basketball hoops, such as in-ground, portable, and wall-mounted, offer various benefits. In-ground hoops provide the most stability and durability, while portable hoops are flexible and can be moved as needed, making them suitable for different locations.
- Height Adjustment: Consideration of whether the hoop has an adjustable height feature can be important, especially for families with children. An adjustable hoop allows for different skill levels to enjoy the game, accommodating both young players and adults.
- Material Quality: The materials used in the hoop’s construction can affect its longevity and performance. Look for hoops made from durable materials like steel for the rim and backboard, as well as weather-resistant finishes to withstand outdoor elements.
- Installation Process: The complexity of the installation process can vary widely based on the type of hoop chosen. Some hoops may require professional installation, while others can be set up with basic tools and a little DIY effort, impacting the overall cost and time commitment.
- Budget: Setting a budget is essential as basketball hoops can vary significantly in price. Consider not only the cost of the hoop itself but also potential installation fees and any additional accessories you may want, such as a backboard padding or a basketball net.
- Local Regulations: It’s important to check any local regulations or HOA guidelines regarding basketball hoop installations. Some areas may have restrictions on the placement or height of hoops, which could influence your installation choices.
How Does the Location Impact the Installation of Your Basketball Hoop?
The location significantly influences the installation of your basketball hoop, affecting factors like safety, accessibility, and performance.
- Space Availability: Adequate space around the hoop is crucial to ensure safe play and proper shooting practice.
- Surface Type: The type of surface where the hoop is installed, such as concrete or grass, affects stability and durability.
- Proximity to Neighbors: Installing the hoop too close to property lines can lead to noise complaints and disputes, impacting your playing experience.
- Lighting Conditions: Good lighting is essential for evening play, thus the location should consider natural and artificial light sources.
- Local Regulations: Some areas have specific zoning laws or HOA rules that dictate where a basketball hoop can be placed.
Space availability is crucial because it allows for safe movement and prevents accidents during play. Ideally, there should be enough clearance around the hoop to accommodate players and any potential rebounds without obstruction.
The surface type where the hoop is installed impacts its stability and longevity. A concrete surface provides a sturdy foundation, while a grassy area may require additional anchoring to prevent the hoop from tipping or shifting during use.
Proximity to neighbors is an important consideration as noise from the basketball can disturb nearby residents. Keeping a reasonable distance helps maintain good relations and reduces the likelihood of complaints regarding noise or errant balls.
Lighting conditions are significant for evening games, as poor visibility can lead to accidents or hinder gameplay. Choosing a location that receives ample natural light or where you can install additional lighting fixtures is essential for maximizing playtime.
Local regulations play a critical role in determining where you can install a basketball hoop. Familiarizing yourself with any zoning laws or homeowners association rules can prevent legal issues or the need for costly adjustments after installation.
What Types of Basketball Hoops Should You Consider for Installation?
When considering basketball hoop installation, there are several types to evaluate based on your needs and preferences:
- In-Ground Basketball Hoops: These hoops are cemented into the ground and provide maximum stability and durability. They are ideal for serious players and offer the best performance, as they are less likely to shake or move during play.
- Portable Basketball Hoops: These hoops come with a base filled with water or sand for stability and can be moved easily. They are great for casual players or those who may want to store the hoop away when not in use, but they might not provide the same level of stability as in-ground options.
- Wall-Mounted Basketball Hoops: These hoops are attached directly to a wall or a structure, making them a good choice for limited space. They are typically fixed and do not take up any yard space, but may limit the area available for play compared to freestanding options.
- Adjustable Height Hoops: These hoops can be raised or lowered, making them suitable for players of all ages and skill levels. This feature allows younger players to enjoy the game while still accommodating adults, making it a versatile choice for family use.
- Commercial Grade Hoops: Designed for heavy use in schools and parks, these hoops are built with enhanced materials and sturdiness. They offer superior durability and performance, making them an excellent choice for public installations or serious players looking for a long-lasting option.
What Are the Step-by-Step Processes for Installing a Basketball Hoop?
Installing a basketball hoop involves several key steps to ensure stability and proper functionality.
- Choosing the Location: Select a flat, level area with sufficient space around the hoop for playing and safety. Ensure the location is free from obstacles like trees or power lines that could interfere with gameplay.
- Gathering Tools and Materials: Collect all necessary tools such as a drill, level, shovel, and concrete mix, as well as the basketball hoop kit which typically includes the backboard, pole, and hoop. Having everything ready will streamline the installation process.
- Preparing the Ground: Dig a hole for the pole according to the manufacturer’s specifications, usually about 2-3 feet deep and wide enough to accommodate the pole. This step is crucial for ensuring the hoop remains stable and secure once installed.
- Installing the Pole: Place the pole in the center of the hole, ensuring it is vertical using a level. Pour concrete mix around the pole and fill the hole, allowing it to set as per the instructions, which usually requires at least 24 hours for full strength.
- Attaching the Backboard: Once the concrete has set, follow the instructions to attach the backboard to the pole, ensuring all bolts are tightened securely. Depending on the design, this may require assistance to hold the backboard in place while attaching it.
- Installing the Rim: After the backboard is securely mounted, attach the rim to the backboard according to the manufacturer’s guidelines. Make sure the rim is properly aligned and securely fastened to withstand consistent use.
- Final Adjustments: Once everything is installed, check the height of the hoop and adjust it if necessary. Ensure that the hoop is at the desired height (usually 10 feet for standard play) and that all components are secure before using the hoop.
What Tools Are Essential for a Successful Installation?
To ensure a successful basketball hoop installation, several essential tools are required:
- Drill: A power drill is crucial for making holes in concrete or wood for anchoring the basketball hoop securely. Choose a drill equipped with the appropriate drill bit size to match the diameter of the anchor bolts for a stable installation.
- Level: A level is essential for ensuring that the basketball hoop is perfectly vertical and aligned. This prevents any tilting or instability during use, which can affect gameplay and safety.
- Measuring Tape: Accurate measurements are vital for positioning the hoop at the correct height and distance from other structures. Use a measuring tape to mark the installation location, ensuring it meets regulation standards for height and distance from the playing area.
- Shovel: If the installation requires digging a hole for the pole, a shovel is necessary. This tool helps in excavating the ground to the recommended depth for the pole, ensuring it is securely anchored and stable.
- Concrete Mix: A high-quality concrete mix is essential for securing the basketball pole in the ground. The concrete should be mixed according to the manufacturer’s instructions to achieve the right consistency and strength for long-lasting stability.
- Wrench Set: A set of wrenches is needed to tighten the nuts and bolts that hold the hoop assembly together. Using the correct size wrench ensures that all connections are secure, which is important for safety and performance during play.
- Safety Gear: Wearing safety gear such as gloves and goggles is important to protect yourself during the installation process. Safety gear helps prevent injuries from sharp tools and debris while digging or handling heavy materials.
How Can You Ensure That Your Basketball Hoop is Set at the Correct Height and Stability?
Regular maintenance is vital to ensure the hoop remains in excellent condition. By routinely checking for loose parts and addressing any wear and tear, you can prolong the life of your basketball hoop and ensure it remains a reliable piece of equipment for years to come.
What Are the Cost Considerations for Basketball Hoop Installation?
- Type of Hoop: The cost of the basketball hoop itself varies significantly based on the type and quality. High-end models with features like adjustable heights and superior materials can range from $500 to over $2,000, while more basic models may start around $200.
- Installation Method: Installation costs can vary depending on whether you choose a professional installation service or a DIY approach. Hiring a professional can add an additional $100 to $300 to your costs, but it ensures proper setup and stability, particularly for in-ground hoops.
- Location and Surface Preparation: The location where the hoop will be installed can impact costs, especially if site preparation is needed. If the area requires leveling, concrete pouring, or landscaping, these services can add anywhere from $200 to $1,000 to the total installation cost.
- Accessories and Add-ons: Additional accessories such as a ball return system, protective padding, or maintenance kits can also contribute to the total cost. Depending on the items chosen, these can range from $50 to several hundred dollars, depending on the complexity and quality of the accessories.
- Permits and Regulations: Some areas may require permits for installing a basketball hoop, especially if it is in-ground. The cost of permits can vary based on local regulations, typically ranging from $50 to $200, and failure to obtain necessary permits can result in fines.
What Is the Average Price Range for Professional Installation?
This price range impacts consumers’ decisions on purchasing basketball hoops and whether to opt for professional installation or a DIY approach. For many families, investing in professional installation ensures safety and optimal performance of the hoop, which can be particularly important for avid players or families with children who are serious about the sport. Moreover, a well-installed hoop can enhance the aesthetic appeal of the home and backyard, potentially increasing property value.
The benefits of professional installation include expertise in achieving the correct height, ensuring stability, and selecting the appropriate location that maximizes playability while adhering to local regulations. Additionally, professional installers often provide warranties on their work, offering peace of mind regarding the installation’s durability and safety.
Best practices for consumers include obtaining multiple quotes from local installers in Cleveland, checking reviews, and asking about warranties. It’s also advisable to confirm that the installer has experience with the specific type of basketball hoop being purchased and is knowledgeable about local zoning laws that might affect installation.
In What Scenarios Might DIY Installation Be a Cost-Effective Option?
DIY installation of basketball hoops can be a cost-effective option in several scenarios:
- Familiarity with Tools: If you are comfortable using basic tools and have prior experience with home improvement projects, DIY installation can save you the cost of hiring professionals.
- Simple Installation Requirements: Some basketball hoop models are designed for easy assembly and installation, making it feasible for individuals to set them up without expert help.
- Budget Constraints: When working with a limited budget, opting for DIY allows you to allocate funds towards a higher quality hoop rather than installation services.
- Customization Needs: If you have specific preferences regarding the location or height of the hoop, installing it yourself gives you the flexibility to customize the setup according to your needs.
- Learning Experience: Engaging in the installation process can provide valuable skills and knowledge about basketball hoop construction, which can be beneficial for future projects.
Being familiar with tools can significantly ease the installation process, as you can confidently handle the steps involved without incurring additional labor costs. With the right approach, even complex installations can become manageable tasks.
Some basketball hoops come with user-friendly instructions and require minimal tools for setup, making it practical for those who may not have extensive experience. These hoops typically feature straightforward designs that enhance accessibility for DIY enthusiasts.
For those on a tight budget, choosing to install the basketball hoop yourself allows for more flexibility in spending. This way, you can invest in a better-quality hoop while avoiding the extra expense of hiring professionals.
When it comes to installation, personal preferences can play a crucial role. DIY installation empowers you to choose the exact placement, height, and angle of the hoop, ensuring it meets your specific playing style and needs.
Moreover, taking on the DIY challenge can be a rewarding learning experience. It not only equips you with practical skills but also instills a sense of accomplishment once the hoop is successfully installed.
Why Should You Choose Professional Installation Over DIY?
You should choose professional installation over DIY for the best basketball hoop installation in Cleveland because it ensures proper setup, safety, and optimal performance of the equipment.
According to the National Association of Sports Officials, proper installation can significantly affect the durability and safety of sports equipment, including basketball hoops. A professional installer is trained to follow manufacturer guidelines and local regulations, minimizing the risks associated with improper setup.
The underlying mechanisms behind the advantages of professional installation include expertise and experience. Professionals are familiar with the necessary tools and techniques to secure the hoop correctly, preventing issues such as instability or improper height adjustment. Furthermore, they can assess the installation site for factors like soil type and drainage, which are crucial for ensuring the longevity and safety of the hoop. This knowledge helps avoid potential pitfalls that a DIY approach may overlook, leading to better performance and user satisfaction.
Additionally, hiring professionals can save time and effort. According to a study by the Home Improvement Research Institute, homeowners often underestimate the time required for DIY projects. Professionals can complete the task efficiently, allowing you to enjoy your basketball hoop without the hassle of installation stress.
What Advantages Do Experts Provide for Secure Basketball Hoop Setup?
When considering the installation of a basketball hoop, enlisting the help of experts offers multiple advantages that ensure a secure and well-executed setup. Here are some key benefits:
-
Expertise: Professionals bring experience and knowledge about proper installation techniques, ensuring that the hoop is installed at the correct height and angle for optimal gameplay.
-
Safety Assurance: A secure installation minimizes risks of accidents. Experts know how to anchor the hoop appropriately, taking into account the local terrain and weather conditions.
-
Time Efficiency: Professionals can complete the job more quickly than most homeowners, who may lack the necessary tools or experience. This allows you to enjoy your new hoop without long delays.
-
Quality Materials: Experienced installers often have access to higher-quality materials and equipment, contributing to a more durable installation.
-
Comprehensive Service: Many installers offer additional services like maintenance or removal, providing support throughout the hoop’s lifespan.
Choosing expert installation not only ensures safety and durability but also enhances overall performance and enjoyment of your basketball experience.
Which Local Services Offer the Best Basketball Hoop Installation in Cleveland?
The best basketball hoop installation services in Cleveland include the following options:
- Cleveland Hoop Installers: Known for their professional and efficient service, Cleveland Hoop Installers specializes in both residential and commercial basketball hoop installations.
- Hoop Dreams Installation: This company offers customized installation services, ensuring that the hoop is set up to meet the specific needs and preferences of each customer.
- All-Star Sports Installation: All-Star Sports is notable for its experienced team, providing quality installations along with additional services such as hoop maintenance and repair.
- Local Handyman Services: Many local handyman companies offer basketball hoop installation as part of their services, providing a cost-effective and flexible option for homeowners.
- Big Box Home Improvement Stores: Retailers like Home Depot and Lowe’s often provide installation services in addition to selling basketball hoops, making it a convenient one-stop-shop option.
Cleveland Hoop Installers: This service is highly regarded for their attention to detail and expertise in setting up various types of basketball hoops. They ensure that each installation is secure and adheres to safety standards, providing peace of mind for families and schools alike.
Hoop Dreams Installation: With a focus on customer satisfaction, Hoop Dreams Installation takes the time to understand each client’s vision and preferences. They offer various mounting options and can work in different types of terrains, making them a versatile choice for homeowners.
All-Star Sports Installation: All-Star Sports stands out for their commitment to quality and service, employing a team of skilled technicians who are well-versed in the specifics of basketball hoop setups. They also provide ongoing maintenance services, which is beneficial for long-term care of your investment.
Local Handyman Services: Utilizing local handyman services can be a great way to save money while still receiving quality installation. These services often come with flexible scheduling and the ability to combine multiple home repairs or improvements in one visit, making it convenient for busy homeowners.
Big Box Home Improvement Stores: For those looking for a comprehensive shopping experience, big box stores like Home Depot and Lowe’s provide both the equipment and the installation service. This can be particularly appealing to customers who prefer to see the hoops in person before making a purchase.
What Should You Look for in a Reliable Installation Service?
When searching for a reliable basketball hoop installation service, consider the following factors:
- Experience: A service with extensive experience in hoop installation is essential. They are likely familiar with various types of hoops and different installation challenges, ensuring a secure and proper setup.
- Reviews and Testimonials: Check customer reviews and testimonials to gauge the quality of the service. Positive feedback from previous clients can give you confidence in their reliability and workmanship.
- Insurance and Certifications: A reputable installation service should have the necessary insurance and certifications. This protects you from potential liability in case of accidents and ensures that the technicians are properly trained.
- Warranty and Guarantee: Look for services that offer a warranty or guarantee on their work. This indicates that they stand behind their installation quality and are willing to rectify any issues that arise post-installation.
- Transparent Pricing: A reliable service should provide clear and upfront pricing without hidden fees. Understanding the total cost before the installation helps you budget appropriately and avoids unexpected expenses.
- Availability and Flexibility: Consider the availability and flexibility of the installation service. They should be able to accommodate your schedule and provide timely installation to meet your needs.